This holiday season, we're doing another felted homemade gift - beeswax candles. Super easy, infinitely customizable, and so cute.
I'm just going to get this out of the way - my inspiration came from here and here. Except my felting technique was taking from here instead of the other. It works for us.
So this was pretty easy and fun and these will be gifts "from the boys." Baz actually did help felt that two that we made for the purposes of this post, and will help with the rest of the jars. Ultimately we'll have twelve.
Here are the tools and skills you'll need for twelve half pint beeswax felted candles.
*12 Half Pint Mason Jars
* 5lbs beeswax - purchase locally or from a variety of etsy stores. I had a schmorgasboard and am actually about a pound short, so I'll be make another order to fill that void.
*candle wicks - I bought mine at Michaels and they were pre-cut to 3.5 inches. You can also buy a large spool and cut it down.
*Felting Wool. Again - I had a variety. I will say that the wool I bought from a local boutique (now closed - SOB) is far superior to what I got at Michaels, but the wool from Michaels worked just fine so don't stress out. (It's back with the embroidery, if you're looking.)
*Felting needle - not necessary, but nice to have. And you can needle felt a design onto yours, if you're so inclined.
*Optional: essential oils to mix into the wax. I like the smell of pure beeswax, so I left it plain.
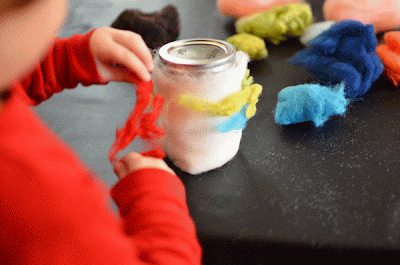
Step one: wrap jars.
However you like, with whatever colors strike your fancy. It won't lay perfectly, and that's ok. It's being made by a person, not a machine.
I did a bit of needle felting to get the strands to stay in place, but then I ended up dunking it to get it wet before wrapping the whole thing with a stocking.
Yes, we eat popcorn from that bowl. You'll want soapy water (I actually gave a squirt of dish soap on each jar) and you'll want to use actual hose (the toe part) to keep everything in place. Then you just agitate until the fibers tighten up. I also suggest felted with the lid on - to keep the fibers in place so you can close it up later.
While they're drying, put the wax in a pot and turn up the heat. You don't want it too hot (obviously) but too cool and the wax doesn't melt evenly.
I experimented with the pouring of the wax - some I filled up straight away and some I layered in. I found that layering helped keep the wicks straightest. Also - some of the wax has now cracked and caved in a bit, so when I melt the final pound to finish the jars, those will get a dollop on top to even things out.
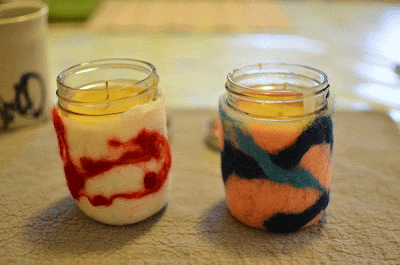
You could do the wax part first - in fact, the only two jars that were felted before they got waxed are the two below.
So that's it. Given the right circumstances, you could do these in a weekend - counting drying and cooling time. Then just wrap them up and gift them to people who could use a little glow in their lives.
I think I'll be packaging mine with Ashley Ann's "Best Of My Day" calendars.
Happy Crafting!


Your post is awesome. You have shared very valuable information to us. Thank you so much for sharing this.
ReplyDeleteHandmade Candles